As it is nearing the end of this year, I thought I would follow in Julie's footsteps and look back at my resolution. I use the singular, because I only had one resolution for 2013. It was a broad resolution, so I figured it meant I could incorporate the resolution into many areas of life.
To see last year's post about my resolution, go here.
To quote from that post:
"My resolution for 2013 is to be more active.
As simple as that. I want to be more active in many areas in my life-physically, socially, spiritually, etc."
So, how did I do? I think I did a good job at being "more" active. In 2012, I don't feel like I did much at all. While I increased my activity in 2013, I still think I could have been more active. That being said...let's take a look at a few of the things I did in 2013!
More activity-from January, when I was still actively embracing my resolution (ha, no pun intended...sort of)
Tryon Creek State Park-from March, when Mom and I went on a hike
The Human Condition-from April, when I was active emotionally, even without planning on it (that's activity, right?)
Productivity-from April, when I felt productive (which includes activity!)
Can of Worms-from June, when I sang a silly song that prompted lots of silly questions
Disappointment-from June, when I had a "DTR" with a guy initiated by me (if you know me well, you know how hard that was for me, which is why I am listing this as an accomplishment from 2013...despite the disappointing outcome)
Singer/songwriter-from June, when I attempted (almost successfully) to write a song-music & lyrics!
Revised Summer Reading List-from June (updated later, too), when I made a "to-read" list and checked books off (of course, I kept adding to the list, even mentally-that took my attention away from a lot of the list! woops!)
Movies-from July, when I went to the movies TWICE in one month (once with a friend, once with family)
DIY-shutters-from July, when I spray painted and repurposed a couple shutters
Bittersweet Change-from August, when I changed jobs and became a "classroom" teacher
What's New? #1-from September, when I finally posted pictures from my amazing road trip in July/August
What's New? #2 and My Classroom-from September, when I reorganized and cleaned my new classroom
What's New? #3-from September, when I looked back on my grandfather's passing in August
What's New? #4-from September, when I looked back on my move from Oregon City to Salem at the end of August
Slow and Steady Wins the Race?-from October, when I considered having a housewarming party (which I had in November, I think...)
Classroom DIY: Whisper phones-from November, when I made whisper phones for my classroom
DIY Penguin Ornaments-from December, when I made cute penguin ornaments for my students
Parmesan Garlic Knots-from December, when I made an appetizer for our staff Christmas party
Ok, so I think I was pretty active. You probably could've just looked at the blog archive to see all of these, but listing them here makes me see how much I really did this year. In addition to this, I have now played in 2 community bands in 2013, I have subbed in a bell choir, I was a bridesmaid at a friend's wedding, I put together a PreK-8th grade spring concert, I applied to a BUNCH of teaching jobs and had 3 interviews, I attended (albeit late!) another friend's wedding, I went to my friends' concert in LA (Saints!-check 'em out!), I found a church home, I started coaching Bible Quiz at church, and I've taken steps to join a bell choir in Salem (though I can't start playing with them until 2014). I also started the year off with a little more physical activity than in much of 2012. I think I ended 2012 fairly well with the physical activities, but I slacked off there at the end of 2013. The social part was hard...I have struggled with this since moving to Oregon much more than I think I ever did in California.
Here's to another great year of resolutions! Look for a post tomorrow with my 2014 resolutions! :)
Monday, December 30, 2013
Saturday, December 28, 2013
Parmesan Garlic Knots
Last week we had a staff Christmas party. We all signed up to bring something to contribute to the meal. I signed up for an appetizer. I wracked my brain for about a week to figure out what to bring. I finally decided on parmesan garlic knots. I had seen the recipe on pinterest OR a friend made them...I can't remember. Either way, I decided to try my hand at them.
They are a fairly easy appetizer to make.


They are a fairly easy appetizer to make.

Ingredients: Biscuits (I used Pilsbury Grands), Parmesan cheese, minced garlic, and butter (not pictured).

Now that you've gathered your ingredients, melt the butter. I melted it in the microwave to save time as I was in a bit of a hurry, but my preference is to melt it on the stovetop. I think it tastes better that way. While the butter is melting, take one biscuit at a time. Flatten it, and slice it in half. Take one half, roll it into a "snake". The length and thickness are a matter of personal preference, but you do need to be able to tie the dough into a knot, which is what you do next. It's a bit odd, but you actually do tie a knot with the dough. It should stick a little and need to be pulled a bit to get it through and make a knot.

After you tie the dough into a knot, place it on a baking sheet (or other baking device, as later you'll see I used a few cake pans when I ran out of clean baking sheets...haha). They look kind of cute like this, don't they? I didn't take pictures of the next few steps, since my hands were so messy. Brush on melted butter with a pastry/basting brush. If you don't have a pastry or baking brush, I would recommend getting one. I found one for less than $2.00 at our local grocery store. I will admit it's sort of a low-end grocery store, so it may be a little more expensive at your store. However, it's worth the investment if it's only a few dollars. After brushing on the butter, I rubbed on a little bit of the minced garlic. There is no amount that I used...I guessed as I went and tried to make sure each knot had the same amount of garlic as the others. Last, sprinkle on a bit of parmesan cheese. Again, no amount. I just tried to match from knot to knot. Look at the baking instructions on the biscuit package. I cooked mine for 1 minute less than the short-end of the baking time, and they were a little crispy on the bottom. Admittedly, I did not use cooking spray on the baking sheet which might have helped with the dark bottoms on the knots. Our oven also runs a little high, and since I was rushing to be done in time, I didn't think to lower it a smidge like I usually do. If you're worried about your knots, stay close and keep an eye on them. I think mine were only in for 7 minutes, so it's not a long bake time.

When they came out of the oven, I brushed on a little more melted butter.

Here's the final product. I was a little disappointed that they were slightly overcooked. They weren't burnt, but they weren't in that magical perfectly cooked middle, either. They are flavorful, but if you make large knots (some of mine were a little too big), they can be less flavorful. Be careful with your knot size. If you want to be extra prepared in the favor department, you can always buy the butter flavor biscuits (or another flavor!).
I got some compliments at the Christmas party, even though I had baked them that morning and reheated them in my coworker's oven. Oh, and despite the slightly overcooked nature of my knots...
Maybe you'll have better luck at the recipe than I did? Or maybe you're at least a more watchful baker than I was? Haha!
DIY Penguin Ornaments
So, in mid-November I started thinking about a few options for gifts I could give to my students for Christmas. I knew with only 10 students I could afford to put a little more money or a little more effort (or both!) into the gifts. I vaguely remembered seeing some adorable ideas on pinterest (which I've been avoiding the last few months, since it takes up so much of my time if I let it!), so I went and browsed around through my pins and random pins.
I found a few ideas to make penguin ornaments out of lightbulbs. I didn't particularly like any of the exact pins that I found...especially since very few had any DIY instructions. I figured it couldn't be too difficult to figure out, so I decided to make my own version and share it on my blog. Maybe I'll even pin it and share my "instructions".
It's not a complicated process, but you do need a few tools in order to make these adorable ornaments. You'll need:
-One lightbulb (standard, not coil) per ornament you'd like to make
-Black, white, and orange paint (I used acrylic paint that specified that it worked on glass surfaces)
-A hot glue gun
-Multiple glue sticks for the glue gun
-Ribbon (color of your choice)...not too thick if you are going to use it for bow ties.
-Googly eyes (if you want to glue them on instead of painting them on)
 The paint I used: Martha Stewart Acrylic Paint. Of course I didn't take a picture of the front of the bottles...but this is specifically for glass surfaces. Martha's paints are a little pricier than the "standard" brands...but I happened to catch them on a sale day, which meant they were the cheapest I could buy at the time! They are great paints, but I'm not sure I would have bought them if they were full price.
Here's the process I went through:


.JPG)
.JPG)
.JPG)
I found a few ideas to make penguin ornaments out of lightbulbs. I didn't particularly like any of the exact pins that I found...especially since very few had any DIY instructions. I figured it couldn't be too difficult to figure out, so I decided to make my own version and share it on my blog. Maybe I'll even pin it and share my "instructions".
It's not a complicated process, but you do need a few tools in order to make these adorable ornaments. You'll need:
-One lightbulb (standard, not coil) per ornament you'd like to make
-Black, white, and orange paint (I used acrylic paint that specified that it worked on glass surfaces)
-A hot glue gun
-Multiple glue sticks for the glue gun
-Ribbon (color of your choice)...not too thick if you are going to use it for bow ties.
-Googly eyes (if you want to glue them on instead of painting them on)

Here's the process I went through:

1. I painted "the belly" onto the lightbulb. The area I painted was much larger than the final belly would be, but it's easier to paint dark colors over light colors than vice versa.
2. (Not pictured) I blow dried the paint with a hair dryer. It's a little silly, but it made the process go pretty fast. Then I drew the belly on top of the dried white paint.

3. Next, I painted around the drawn-on belly with the black paint. Again (not pictured) I used the blow dryer to speed up the drying process. Once the black paint is dry, you should probably get the glue gun heated. If your glue gun heats slowly, you might want to turn it on before the black paint dries!
*Note: If you choose to paint on the eyes, you do not need to turn on your glue gun quite yet.

4. After the black paint had dried, I painted on a nose/beak/bill (whichever term you use for a penguin...). Here you can also see the remains of the sketched-on belly. I again used the blow dryer to dry the orange paint quickly.
.JPG)
5. Once all of the paint was dry, I used my pre-heated glue gun to glue on the googly eyes. *If you are painting on the eyes, this is when you would do so. If that is the case, you probably want to turn on your glue gun about now...
.JPG)
6. My sister is the kindest person on the planet...or at least she was the day we made these. I cannot for the life of me make a little bow tie. She was kind enough to make the bow ties. She was also kind enough to glue on the bow ties and glue on the ribbon at the top. (I was exhausted from a full day of work and our school Christmas program that night, and I wanted to take the ornaments in with me the next day. She made that dream come true!!) To make the loop/wrapped ribbon at the top, simply cut a length of the ribbon (I think my length was about 6" or so...I can't remember for sure). Tie a knot near the ends of the ribbon. Glue the knot to the metal part of the lightbulb (the part that resembles a screw). Then glue around the metal, pressing the ribbon to the glue and wrapping it as you go. Make sure you leave a long enough loop of ribbon to hang the ornament on your Christmas tree.
.JPG)
7. Since my ornaments were gifts for my students, I used a gold paint pen (not listed in my tools above) to write their names on the front of the penguin (underneath the belly). On the back, I then wrote:
"<3 miss="" p="" wilson="">
.JPG)
SCS 2013"
.JPG)
8. I hung up all 12 penguins that I made (10 for my students, 1 for me, and 1 for my sister) on the tree we had in our classroom. It's a little difficult to see the ornaments on the tree in the picture, but they are there!
Overall, this was a fairly inexpensive DIY. If I had purchased ornaments for my students, I think it would have been MUCH more. I bought the lightbulbs for less than $10. I also bought the paint for about $1.50 per bottle. The ribbon was $2 per roll (I used a full roll and part of a 2nd). I already had the googly eyes, glue gun, glue sticks, and paint pen. Altogether, the cost was less than $20, which is less than $1.75 per ornament. :)
My students absolutely LOVED them. They were so excited when they first saw them, and they loved to go over to the tree and "find" their penguin, even though it never moved...haha.
I think if I had a class of 30 students I might still do something like this...it would've been less than $60, even if I had to buy triple the supplies. I don't think I would, though, since there was plenty of paint left in the white and black, and the orange was barely used at all! I think I might need a second tube of black and white, just to make sure I had plenty. It would take much more time to make these for a larger class, but I would definitely still want to make them. I think it's nice for students to have something handmade from their teacher. :)
Merry belated Christmas! I hope you felt blessed by God's love and his gift of Jesus! I pray God's blessings as you end 2013 with your loved ones, and that you enter 2014 in good spirits and with lots of exciting plans or hope to make some great plans! :)
God bless!
Wednesday, December 25, 2013
Feliz Navidad!
Merry Christmas to everyone who reads this blog! I haven't been the best blogger as of late. I'm sorry!
I have a few blog posts that are "in the works", but I haven't had the energy or time to complete them quite yet. As I am on Christmas break, that will change! Now that Christmas is here, I should have a little more time since I don't need to scramble around like I have been the last few days!
Upcoming blog posts to include:
DIY Christmas presents for my students
A "new" classroom tour
What's been going on over the last month or so?
So...stay tuned!
Thursday, December 5, 2013
Good King Wenceslas
On Tuesday, I read a book to my class during read aloud time called "Good King Wenceslas". I can't really find the author's name, but this version comes with a DVD (CD?) where Jane Seymour narrates and the Mormon Tabernacle Choir performs. It's a narrative of the story that's told in the Christmas carol of the same name. I've always liked that carol, because I thought it was funny that Stephen had a feast. As a child (and young[er] adult!), I didn't understand that "Feast of Stephen" meant that it was the Feast day of Stephen, nor did I have any clue what "Feast day" meant. That is, until I worked at a Catholic school and I discovered that there are many Feast days, and the Feast of Stephen just happens to be in December near Christmastime.
Ok, all that said...it's a great carol. It tells of a kind king, who instead of selfishly staying in his warm castle goes out into the cold snowy night with his page boy to help out a poor man and his family by taking them food and wood for a fire (winter fuel!). So many things I misunderstood as a child become clear as I learn more about our world and have a greater understanding of the meanings that words have. Funny how that works, right?
Anyway...besides the story, I wanted to share this picture:

This picture is from our "Epic Roadtrip" this past summer. We went to Iowa, and when we met our friends for dinner, they suggested we meet in the Czech Village area. While walking around down there, I saw this and snapped a picture. I am amazed that this guy existed and his story is being carried on. It makes me wonder what other things he did, though, and why we don't mention his "goodness" in other narratives. It might be worth researching to see if it's just passed down in the Czech culture and hasn't been made known to the rest of us who are ignorant of just how good King Wenceslaus was! :)
Thursday, November 28, 2013
Classroom DIY: Whisper phones
So, I am a huge proponent of doing things on the cheap as much as possible. I don't always have the time or energy to seek out the cheap options, but when I find a way to do something in a less expensive way (that doesn't change the effect of the item), I do it!
I am regularly (although less lately) browsing boards on pinterest to find great ideas for both home and classroom. One that I kept seeing repeatedly (and over the last couple years!) was a DIY version of the whisper phone. For those unfamiliar with whisper phones, here's the idea: Whisper phone 1 and Whisper phone 2. Now, both of these are decent products. I've seen them when I'm browsing in the teacher supply stores. They're great. Younger students use them to hear themselves saying sounds, reading, etc. They are very helpful in getting students to say sounds correctly, hear themselves reading, and especially for keeping the classroom quieter during reading time while still allowing students to read aloud.
Now, if you went to both links, you may have discovered that the cheapest option from those two suppliers is $4.46 per whisper phone. It's quite possible that there are cheaper options online for someone willing to spend a while searching. I'm not willing to do that, since these days my free time feels more valuable and spending any extra minute searching for something that's not for me personally is not my #1 priority. I have 10 students. If I bought one whisper phone per student at $4.46, that would cost me $44.60. Ouch. But since I would like to have a few extras just incase some break (I have some rough boys in my class), it would cost even more! Let's say I wanted 3 extras. The new total would be $57.98. My pocketbook can't take that kind of thing...especially for ONE thing/group of things for my classroom. Ick.
I know these are probably things I will use again as time goes by and I keep teaching. But let's be real here. Why spend tons of money when it's unnecessary? Not to mention that if I have more than 3 that break I'll need to spend even more money to replace broken whisper phones! Or if my class size increases? Ah!!
So, after stopping to consider what this DIY would entail, I realized it was a fairly easy project, and it would save me TONS of money. Plus, it would be easy to replicate if I needed to replace or make more whisper phones.
So, about a month ago I went to Home Depot. I bought pvc piping (3/4" width), pvc elbows (again, 3/4" width), and a roll of cute duct tape. I am sure I could have purchased the duct tape elsewhere (say...Walmart?) and saved money, but in the moment I was tired and looking to save time. Even in buying the duct tape at Home Depot, I saved. At Home Depot they have a convenient little pvc cutting station, where I was able to cut my pieces into the 5" length I had decided on. I bought the elbows in the contractors' bulk packs, which made for additional savings! I was looking at short pieces of pvc pipe, and when I was looking and grabbed about 4 or 5 short pieces, a worker walked by and suggested that I buy a long piece instead. I said that I didn't need that much pipe, but the guy said it was cheaper to buy the long piece and I could leave the length of pipe I didn't need on the floor. GREAT! So I cut up my pvc pipe and went and purchased my supplies.
Now, I also bought a roll of purple electrical tape and cute baseball ornaments from the Christmas decor area (yep, it was already there in late October). But even with my extra items, my total was less that $16. That's less money than it would cost for 4 whisper phones!!!! Oh, and did I mention that I purchased supplies to make 15 whisper phones? YEP!!!
Of course, when I got home and tried to put the things together I discovered that 5" was too long for the phones to function. Woops. I guess I didn't think that part through. So, after a couple weeks of searching for my receipt and not finding it, I called Home Depot and explained my situation. They told me I didn't need my receipt, but to just bring the pieces in and cut them shorter. How wonderful is that?! I took the pieces down the Home Depot and cut them to 3", which turned out to be a MUCH better length. So, about 2 weeks ago (ok, it was like...11 days, so a week and a half?) I actually put the whisper phones together!
Here are some pictures of the DIY. It's super simple. Seriously.

.JPG)
.JPG)
.JPG)


I am regularly (although less lately) browsing boards on pinterest to find great ideas for both home and classroom. One that I kept seeing repeatedly (and over the last couple years!) was a DIY version of the whisper phone. For those unfamiliar with whisper phones, here's the idea: Whisper phone 1 and Whisper phone 2. Now, both of these are decent products. I've seen them when I'm browsing in the teacher supply stores. They're great. Younger students use them to hear themselves saying sounds, reading, etc. They are very helpful in getting students to say sounds correctly, hear themselves reading, and especially for keeping the classroom quieter during reading time while still allowing students to read aloud.
Now, if you went to both links, you may have discovered that the cheapest option from those two suppliers is $4.46 per whisper phone. It's quite possible that there are cheaper options online for someone willing to spend a while searching. I'm not willing to do that, since these days my free time feels more valuable and spending any extra minute searching for something that's not for me personally is not my #1 priority. I have 10 students. If I bought one whisper phone per student at $4.46, that would cost me $44.60. Ouch. But since I would like to have a few extras just incase some break (I have some rough boys in my class), it would cost even more! Let's say I wanted 3 extras. The new total would be $57.98. My pocketbook can't take that kind of thing...especially for ONE thing/group of things for my classroom. Ick.
I know these are probably things I will use again as time goes by and I keep teaching. But let's be real here. Why spend tons of money when it's unnecessary? Not to mention that if I have more than 3 that break I'll need to spend even more money to replace broken whisper phones! Or if my class size increases? Ah!!
So, after stopping to consider what this DIY would entail, I realized it was a fairly easy project, and it would save me TONS of money. Plus, it would be easy to replicate if I needed to replace or make more whisper phones.
So, about a month ago I went to Home Depot. I bought pvc piping (3/4" width), pvc elbows (again, 3/4" width), and a roll of cute duct tape. I am sure I could have purchased the duct tape elsewhere (say...Walmart?) and saved money, but in the moment I was tired and looking to save time. Even in buying the duct tape at Home Depot, I saved. At Home Depot they have a convenient little pvc cutting station, where I was able to cut my pieces into the 5" length I had decided on. I bought the elbows in the contractors' bulk packs, which made for additional savings! I was looking at short pieces of pvc pipe, and when I was looking and grabbed about 4 or 5 short pieces, a worker walked by and suggested that I buy a long piece instead. I said that I didn't need that much pipe, but the guy said it was cheaper to buy the long piece and I could leave the length of pipe I didn't need on the floor. GREAT! So I cut up my pvc pipe and went and purchased my supplies.
Now, I also bought a roll of purple electrical tape and cute baseball ornaments from the Christmas decor area (yep, it was already there in late October). But even with my extra items, my total was less that $16. That's less money than it would cost for 4 whisper phones!!!! Oh, and did I mention that I purchased supplies to make 15 whisper phones? YEP!!!
Of course, when I got home and tried to put the things together I discovered that 5" was too long for the phones to function. Woops. I guess I didn't think that part through. So, after a couple weeks of searching for my receipt and not finding it, I called Home Depot and explained my situation. They told me I didn't need my receipt, but to just bring the pieces in and cut them shorter. How wonderful is that?! I took the pieces down the Home Depot and cut them to 3", which turned out to be a MUCH better length. So, about 2 weeks ago (ok, it was like...11 days, so a week and a half?) I actually put the whisper phones together!
Here are some pictures of the DIY. It's super simple. Seriously.

Here's the contractor bulk pack. They had 10 elbows in each bag, which was perfect to make 5 phones. I bought 3 bags at around $2.50 each. (Again, I can't be exact since I can't find my receipt.)
.JPG)
Here are all my supplies and a completed whisper phone.
.JPG)
Here's a closer view of the adorable duct tape I found at Home Depot. It kind of goes with my "all-star" job chart, which is a baseball theme. Not a direct connection, but still cute.
.JPG)
Start by grabbing 2 of these elbows and one 3" length of pvc (not pictured here).

Then cut a short piece of duct tape (about 3") and roll it around a length of pvc.

Next, you push the elbows onto the ends of the length of pvc. You'll have to twist them to adjust the angles and match them so it will work as a "phone". Be careful not to scrunch the duct tape too much. A little bit is inevitable at the 3" length. I almost wish I'd cut them to 3 1/2" instead.

Here are the first few completed whisper phones ready to go in the box! I put the box on top of my library shelf, and I let the students use them during reading groups, quiet reading when they finish their work, and even math! Some of them asked to use them during fact practice so they can say the math problems out loud. I'm all for it, especially if it helps them!

Haha, here I am modeling the whisper phone. :-p
I enjoy DIY projects, but I don't always find the time for them. I do have another one in the works...Christmas gifts for my students! I'll post photos from that DIY once it's complete! :)
Happy Thanksgiving! I hope you and your family remember all the blessings God has poured into your lives, and thank Him for them! I know there are WAY more blessings in my life than I could list and I cannot adequately express my thanks. So instead, I'll share my students' memory verse from this week.
"Give thanks to the Lord, call on His name; make known among the nations what He has done."
Psalm 105:1
God Bless! :)
Thursday, November 14, 2013
Haikus
It's been a while since I posted. I will have to post a real update soon, but I wanted to share about the poetry my students are working on...first we wrote acrostic "poems" about the planets. They don't fully understand how they should work, but it was definitely a starting point!
Now we are working on nature haikus. They have been brainstorming about things in nature and writing descriptions of whatever animal, plant, etc. that they chose. For my example haiku, I wrote about the wind. Here is my example haiku:
Wind
Strong, invisible;
Howling through the trees at night;
Reminds me of God.
Haikus are fun, because the formula is fairly simple, which is especially important when working with 6-8 year olds. :) They seem to have a pretty good grasp on the 5/7/5 aspect. We practiced clapping syllables in various words. I am excited and nervous to see their first attempts at writing lines that actually have the correct number of syllables. They might get to that today!! :)
Sunday, October 13, 2013
Slow and Steady Wins the Race?
So, it's been about a month and a half now that I've lived in Salem. That's weird. It feels like I've lived here longer than that in so many ways, and yet it also feels like it can't have possibly been that long!
Anyway, the point is that my sister and I are slowly settling into the apartment. We continue to add things, rearrange, decorate, etc. I am sure it will continue for a few more months. I like how things are turning out, especially when we grocery shop and spend WAY less than our budget. :) That's fun.
I felt like I needed to post, but I guess I don't have all that much to say. Maybe one of these days I'll try to plan a house warming (apartment warming?) party? I don't know who all I would invite, but it would be nice to show people where I live. :)
Thursday, October 3, 2013
Fog
So, this morning was pretty foggy. It was kind of pretty and a little eerie all at the same time.
While I was driving to work, a song came on that somehow made me think of unrequited love....or like...or whatever you want to call it. Whatever you want to call it, the thought I had still works the same. As I was driving down the road, it occurred to me that driving down a foggy road is kind of like unrequited "love". When you are driving in the fog, you think you know where the road is heading...you look ahead and it seems as though the road continues straight ahead. But then, all of a sudden, you can see that the road curves and heads a different direction.
Yep. I can relate to that metaphor, and I feel like it's pretty accurate.
Wednesday, October 2, 2013
Rough Afternoon
Some of you may know that I had an awkward "DTR" back in June. For those unaware, "DTR" stands for "define the relationship". I was interested in a guy who didn't think of me "in that way". He thought of me as a friend. That's great, but not what I thought was going on.
Anyway, over the summer I did my best to move on. We didn't talk for almost 2 months. Like zero contact. We're still "friends"...yep, I put it in quotes. It's nowhere near the same as what it was before. Part of that is because we never see each other since my whole job shift/move. I haven't seen him since June. It's weird.
The reason I brought it up today, though is because I am clearly not "over" him. He came to mind, which is fine to a certain extent. However, it brought on a whole slew of emotions I was not prepared for. I miss him. A lot. He's an awesome guy, and I definitely still want to be his friend. I'm just not sure I know HOW. It's hard. I am having trouble separating our friendship from the emotions/feelings I had/have for him.
I am doing my darnedest to move on completely, so I felt the need/desire to write about it because despite my awareness that I process best when I write/journal, I always drag my feet about journaling. Well, here it is. I'm having a hard time today, and it's because I miss him.
So be it. Hopefully writing this and more time will help heal he hurts.
Saturday, September 28, 2013
My Classroom
I finally took pictures of my classroom for you to see! It's a little lived-in, but that's what happens with a group of kiddos! :)
Here's a photo tour...starting in one corner and going around...finishing with a few randoms. :) Enjoy!


Here's a photo tour...starting in one corner and going around...finishing with a few randoms. :) Enjoy!

Corner #1: the door on the left goes to the classroom next door, and the door on the right goes outside.

Wall #1: windows, coat/bag hooks, cubbies.

Corner #2: cubbies, rocking chair (a.k.a. "granny's chair").

Corner #2: another view...I got this beautiful rug from my Aunt Virginia! :)

Wall #2: math board, "granny's chair".

Wall #2: whiteboard, handwriting alphabet, flags.

Wall #2: baseball field job chart.

Wall #2: VIP board.

Corner #3: more handwriting cards, job/VIP board, fake tree, library.

Corner #3: another view...colorful pillows, and a great rug that my mom gave me!

Wall #3: library, computer desk, storage.
Wall #3: storage, giraffe poster :) .

Wall #3: close-up of giraffe poster-I love it!

Wall #3: great skylight! I had the blinds closed from our lockdown practice...

Wall #3: storage, baseball poster.

Wall #3: sink area.

Corner #4: storage, sink area, fish tank, more storage, and that door leads to our very own bathroom!

Corner #4: another view...see how convenient our bathroom is?

Wall #4: giraffe growth chart, extra chairs.
Wall #4: loft storage!

Wall #4: more storage and a great art gallery of gifts from my students!

Near the sink area is a "rainbow" shaped table, where the kids "check in" each morning...an idea I stole from Kelsey at SJA!

A better view of the classroom, including student desks! :)
For photos of my classroom before the school year started, go here. :)
Saturday, September 21, 2013
Things That Made Me Laugh This Week
1. My students. Daily. I
can't think of any huge examples...they're just funny.
2. This story (copy/pasted from my facebook status): "I thought some of you might get a kick out of this story. I am absolutely terrified of spiders. There was a spider in my classroom yesterday coming down from the ceiling and my students were blowing at it. I told them to stop. Most of them did. One continued, so I called him over and said, "God created that spider. God loves that spider. You need to be nice to that spider." I NEVER thought I'd say that in a million years!!!"
3. My friend's comment on
the above facebook status: "Spiders are to abide by the articles of the
Treaty of Portland, negotiated and ratified in 1996. 1) All spiders are to
remain outside of human places of dwelling and business. 2) All spiders are to
remain at least five (5) feet from all humans. 2a) A human waives the right to
protection as per Article 2 upon entering traditional spider-occupied
territories, e.g. forested areas, dark caves, etc. 3) Violation of Articles 1
and 2 shall be punishable by immediate and total annihilation. With extreme
prejudice."
4.
This: http://www.buzzfeed.com/kmallikarjuna/times-when-harry-potters-bitch-face-was-better-than-yours
5. My coworkers. A few of us went out to Ixtapa after work yesterday, and we laughed a lot. Again, no big examples, but I love them and they make me laugh.
6. The TV show Bunheads.
7. "Uh oh, spi-doodle
ohs". It's from the TV show Bunheads.
8. My sister. Occasionally,
she is extremely funny. Mostly she's just regular funny. :-p
9. News of the Weird. It's a
segment on my favorite radio station where they talk about really weird stuff
that shows up in the news. Again, I can't remember any specific examples, but I
know it made me laugh.
10. www.tickld.com
I am sure there are more, but my brain isn't functioning at that sort of level. :)
Monday, September 16, 2013
What's New? #4
There have been SO many changes lately, but one of the biggest changes is that I've moved. I used to live in a 1 bedroom, 1 bath apartment that was 720 square feet. It had a dishwasher, washer and dryer in the unit, a balcony, and since I lived on the 3rd floor, vaulted ceilings. I loved my apartment. It was the first place I ever lived on my own, and I was so happy with it in many ways. I will admit, there were times I wished that I had a roommate. It can be lonely living alone at times. But mostly, I loved it.
Now, don't get my wrong. My current living situation isn't bad! It's just not the same. I now live in Salem with my sister. We have a 2 bedroom, 2 bath apartment. I seriously don't have an exact square footage number, but it's like...950? We have a dishwasher and washer/dryer hookups. We don't currently have a washer and dryer, so we've been using the laundry room. We live on the first floor, so we don't have a balcony, but we have a patio. It's nice, but it doesn't have a fence or anything keeping people out. A little weird, but probably mainly because it's different.
Both bedrooms have a bathroom attached. My bathroom also has a door to the hallway. It's nice, but also a little odd. My bathroom is also WAY bigger than it needs to be. We think maybe they weren't sure what to do with the extra square footage. Whatever.
My room is big enough to fit my bed, my bedside table, a small armchair, my old TV stand with the TV, half of my desk, and my sister's dresser. I could potentially fit more, but right now that's what's set up. I don't use my TV, but there's not really anywhere else to store it.
That's the one thing I don't like about this apartment. There is hardly any storage space. Right now, we're using the laundry area as storage, but it we were to get a washer and dryer, we wouldn't have that space and all that stuff we have in there would need somewhere to go. That's one reason NOT to get a washer and dryer.
Living in Salem is interesting. First of all, we're close to just about anything we'd want. Mostly. We can get to things within 10 minutes that would've taken me 30+ to get to from Oregon City. There are also a lot more people on the roads. The convenience of being closer to things means more people within close proximity, too. The one place this bugs me the most is at the grocery store. We've started shopping at Winco, which is kind of like a Food 4 Less (for you Californians). It's cheaper, but it's set up kind of warehouse-like and there are TONS of people shopping, since it's all cheaper. We're saving a lot of money, though, so I think I can get over the crowd situation.
I don't have any photos of the new apartment yet. I will definitely get some posted once we've settled a bit more. We've only lived here about 2 weeks, and we're still unpacking boxes and putting things where they're going to go. It's a slow process, especially since I'm not much help during the week since I come home so exhausted from my 6-8 year old students! :)
I know that living with my sister will have its challenges, but we really do get along better than we used to. We still have our conflicts, but they are fewer and farther between, and as long as we're not tired or hungry, they seem to be less intense. :)
I don't know if I've told you all the kinds of details you'd be interested in, so feel free to ask questions! I am more than happy to answer them, and I promise those pictures are coming...I can't give an actual time frame, but look for them in the next few weeks?
Sunday, September 15, 2013
What's New? #3
Among the many changes over the last couple months is my grandpa's passing. He and my grandma lived in Stanton, CA at Quaker Gardens Senior/Assisted Living until she passed away in March 2011. He was still living there until he passed away on August 10.
His health has kind of yo-yo'd over the past few years. He's gone through major health scares to pretty healthy for a 90-something. He was put on hospice sometime this past spring, and he was pretty stubborn for quite a while and stuck around longer than they thought he would.
It's really hard to talk about this. As he got older, he was less talkative and much less active, but growing up he was always taking my sister and I for walks around the block, or on trips on the Blue Line, or pushing us on the swing in their backyard (until the tore the big tree down, of course!). He always had funny things to say. For example, he told me that I needed to eat the crusts on my bread so that I would grow hair on my chest. Then he would say, "That's what my dad told me when I was a little girl." Oh, grandpa. He was laughing all the time.
I think that was my favorite thing. His laughter, his joy for life, his vibrance. He was the kind of grandpa who would climb up onto the top bunk of our bunks beds with us, just because.

Even though I live so far away from where he was living, it is hard knowing that when I go back to visit in California, he won't be there.
This all happened amidst the new job and prepping for the school year. I actually postponed my trip down to California in order to sign my new contract. I would have arrived in California the evening of August 8 if I had still been working at SJA. But due to the new job and signing my contract on August 8, I didn't arrive until the evening of August 10, and he passed that morning before I got down there. My vacation was originally for fun, but then it became about being in town for his funeral and back in time to get my classroom ready for school. Unfortunately, there wasn't a funeral while I was down. So I still feel like there's a lack of closure. It's frustrating, but I can't honestly say I'm surprised. I wasn't able to be at Grandma's funeral, either.
I love you Grandpa, and I look forward to seeing you again someday in Heaven.
What's New? #2
Ok, so my second post will be about my new job. If you missed my post entitled Bittersweet Change, then this will be news to you. If you read it, hopefully I'll provide enough new information to keep you reading! :)
While I was on my epic road trip (see What's New? #1), I got a call from the principal at Silverton Christian School, offering me the 1st and 2nd grade position. The teacher who had taught 1st and 2nd grade previously had decided kind of last minute to take a year's medical leave. Back in May I had interviewed for the 3rd and 4th grade position, but it was offered to someone else. At that interview, they had mentioned the possibility of another position opening up in the fall, but that they weren't sure yet if it would be open. Well, it suddenly was available, and they called me to offer the job to me.
There are more details about how hard it was for me and what lead to me finally accepting the job here. I arrived back from my epic road trip in the afternoon/evening on August 4, and I accepted the job on August 5. School started on September 3. In between, I had to prep my classroom, find somewhere to live closer to Silverton, and deal with all the regular transitions that come from changing jobs and moving. Originally, I was looking for a room to rent from someone in Silverton. I had my mom helping me look, and I even asked friends on Facebook if they knew anyone/somewhere to look. I also asked the secretary at work if she knew of anyone at the church that could help me find somewhere. Well, my sister had been searching for work and was mainly looking in Portland, but also some in Salem. I asked her (on a whim) if she would be interested in getting an apartment with me in Salem. She agreed, and we pursued that possibility. We looked for some apartments to go look at, drove around Salem and looked at about 3 before finding one that was just perfect! It is just as nice (if not nicer!) than my last place, which was absolutely great. I loved that apartment in Oregon City. I was sad to leave for many reasons. I'm getting sidetracked, though. Back to the apartment in Salem. Another blog post will happen to give more details on that. :)
So, now I am a 1st and 2nd grade teacher. I am no longer teaching 10 different grades and a variety of subjects. I really enjoyed my time at SJA, but I am very thankful for this God-given opportunity at SCS. My coworkers are supportive, welcoming, and friendly. I am enjoying getting to know them. We all seem to work well as a team, and it's nice to have a small staff that seems to be on the same page. The larger the staff gets, the harder it can be to stay on the same page. There are only 8 teachers on staff, including specials. It's small, but cozy. :)
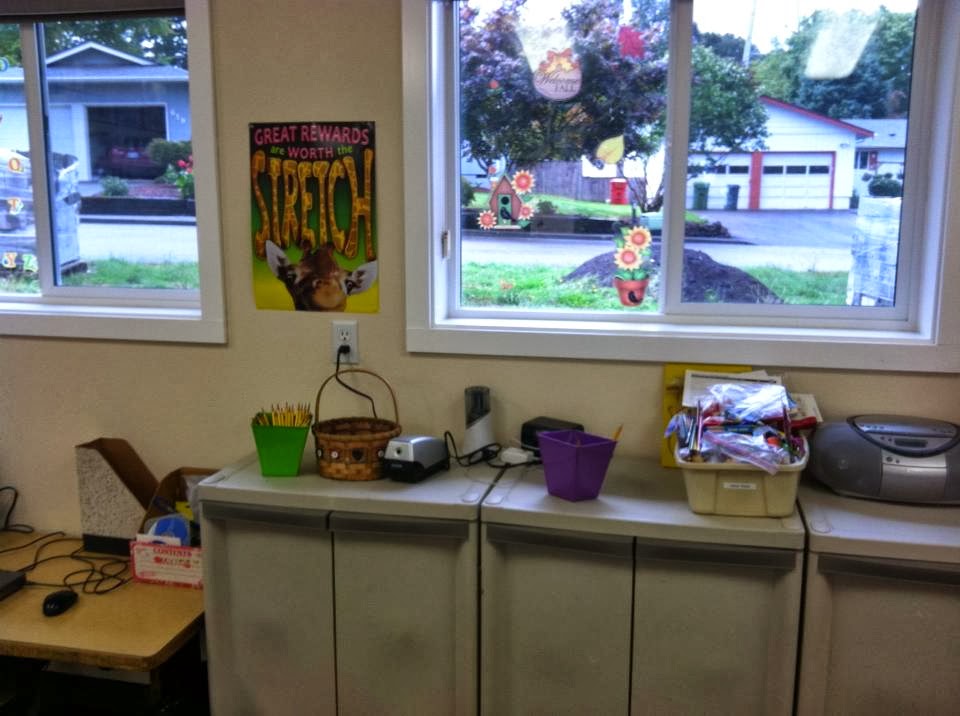
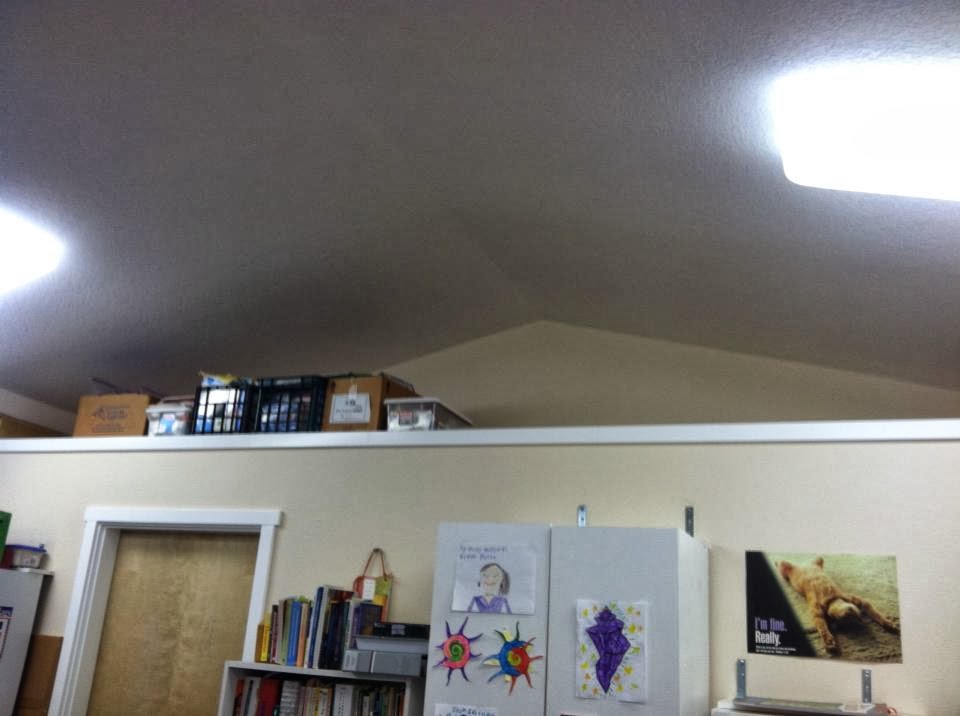
Here are some BEFORE pictures of my classroom. Some of it has stayed the same, because I had limited time to plan and prep for a 1st and 2nd classroom, and because the teacher before me kept things set up pretty well. I will try to remember to take some AFTER photos next time I am in my classroom. :)


There was a third manipulative/game storage cupboard that I forgot to take a picture of. Woops!
As soon as I can, I'll get picture posted of what the classroom looks like now. It's very different, and yet not all that different at the same time. I will admit, I did spend a long time trying to organize everything. Last year was a chaotic year, since they built a new building with new classrooms and moved in part way through the year. The 1st/2nd teacher moved into the new building, and then immediately took time off for medical stuff. So she hadn't settled into the classroom completely.
I've really been enjoying this job. I had an epiphany moment on the 3rd day of school while I was teaching Bible. I felt so absolutely at peace and happy. I knew I was doing what I am supposed to be doing. Praise God for leading me here!
While I was on my epic road trip (see What's New? #1), I got a call from the principal at Silverton Christian School, offering me the 1st and 2nd grade position. The teacher who had taught 1st and 2nd grade previously had decided kind of last minute to take a year's medical leave. Back in May I had interviewed for the 3rd and 4th grade position, but it was offered to someone else. At that interview, they had mentioned the possibility of another position opening up in the fall, but that they weren't sure yet if it would be open. Well, it suddenly was available, and they called me to offer the job to me.
There are more details about how hard it was for me and what lead to me finally accepting the job here. I arrived back from my epic road trip in the afternoon/evening on August 4, and I accepted the job on August 5. School started on September 3. In between, I had to prep my classroom, find somewhere to live closer to Silverton, and deal with all the regular transitions that come from changing jobs and moving. Originally, I was looking for a room to rent from someone in Silverton. I had my mom helping me look, and I even asked friends on Facebook if they knew anyone/somewhere to look. I also asked the secretary at work if she knew of anyone at the church that could help me find somewhere. Well, my sister had been searching for work and was mainly looking in Portland, but also some in Salem. I asked her (on a whim) if she would be interested in getting an apartment with me in Salem. She agreed, and we pursued that possibility. We looked for some apartments to go look at, drove around Salem and looked at about 3 before finding one that was just perfect! It is just as nice (if not nicer!) than my last place, which was absolutely great. I loved that apartment in Oregon City. I was sad to leave for many reasons. I'm getting sidetracked, though. Back to the apartment in Salem. Another blog post will happen to give more details on that. :)
So, now I am a 1st and 2nd grade teacher. I am no longer teaching 10 different grades and a variety of subjects. I really enjoyed my time at SJA, but I am very thankful for this God-given opportunity at SCS. My coworkers are supportive, welcoming, and friendly. I am enjoying getting to know them. We all seem to work well as a team, and it's nice to have a small staff that seems to be on the same page. The larger the staff gets, the harder it can be to stay on the same page. There are only 8 teachers on staff, including specials. It's small, but cozy. :)
Here are some BEFORE pictures of my classroom. Some of it has stayed the same, because I had limited time to plan and prep for a 1st and 2nd classroom, and because the teacher before me kept things set up pretty well. I will try to remember to take some AFTER photos next time I am in my classroom. :)

This picture was taken from the door as you walk into my classroom.

Looking along the wall to the front of the room from the door.

From the door along the back of the classroom.

Inside the classroom, looking to the left wall.

Calendar/Math board to the left of the white board.

The white board and alphabet/handwriting cards around it.

The job board to the right of the white board.

The computer table.

Bookshelf with teacher resources and math tubs.

Storage cupboards with classroom library books on top.

Back corner with work table, counter and sink.

More teacher resources.

My desk.

This was my original desk setup once I heard that I had 10 students.

Manipulative and game storage #1.

Manipulative and game storage #2.
There was a third manipulative/game storage cupboard that I forgot to take a picture of. Woops!
As soon as I can, I'll get picture posted of what the classroom looks like now. It's very different, and yet not all that different at the same time. I will admit, I did spend a long time trying to organize everything. Last year was a chaotic year, since they built a new building with new classrooms and moved in part way through the year. The 1st/2nd teacher moved into the new building, and then immediately took time off for medical stuff. So she hadn't settled into the classroom completely.
I've really been enjoying this job. I had an epiphany moment on the 3rd day of school while I was teaching Bible. I felt so absolutely at peace and happy. I knew I was doing what I am supposed to be doing. Praise God for leading me here!
Subscribe to:
Posts (Atom)